7. EnMAP-Box in High Performance Computing (HPC) environments
Author: Benjamin Jakimow
Publication date: 06/01/2025
Latest update: 13/01/2025
7.1. Introduction
This tutorial provides a guide for installing, configuring, and using QGIS and the EnMAP-Box on a High-Performance Computing (HPC) Linux environment to process hyperspectral remote sensing data.
We cover the following steps:
How to install QGIS and the EnMAP from the command line interface (CLI)
How you can use QGIS and the EnMAP-Box to display, process, and analyze EnMAP data
How you can use the QGIS processing framework to run QGIS and EnMAP-Box processing algorithms and processing models from the CLI,
How the SLURM Workload Manager can be use to schedule and observe jobs, that use QGIS and EnMAP-Box algorithms
Our tutorial addresses users who are familiar with a linux command line. It was tested on the High-Performance Computing Platform (HPC) of the Humboldt-Universität zu Berlin.
7.2. Installation
First of all, we need to install QGIS, the EnMAP-Box and all of its dependencies on the HPC environment.
Login to your HPC shell
Ensure that conda / miniconda is installed and available to you. See miniforge3 for installation instructions.
Example: to activate conda on the HU HPC, you need to load the miniforge3 module.
module load miniforge3
Create a conda environment enmapbox with all dependencies that are needed to run the EnMAP-Box:
conda env create -n enmapbox -f https://raw.githubusercontent.com/EnMAP-Box/enmap-box/main/.env/conda/enmapbox_full_latest.yml
Activate enmapbox and ensure that the local QGIS installation is setup right:
# activate EnMAP-Box environment
conda activate enmapbox

# show version infos
qgis_process --version

# list qgis plugins
qgis_process plugins # list plugins
qgis_process list # list available processing algorithms
To visualize geo-data on the HPC, you can start QGIS in a X-Window:
qgis&Install and activate the EnMAP-Box QGIS plugin. Either start the QGIS GUI and use the QGIS plugin manager, or use the 3Liz qgis-plugin-manager to manage QGIS plugins from the command line.
Call
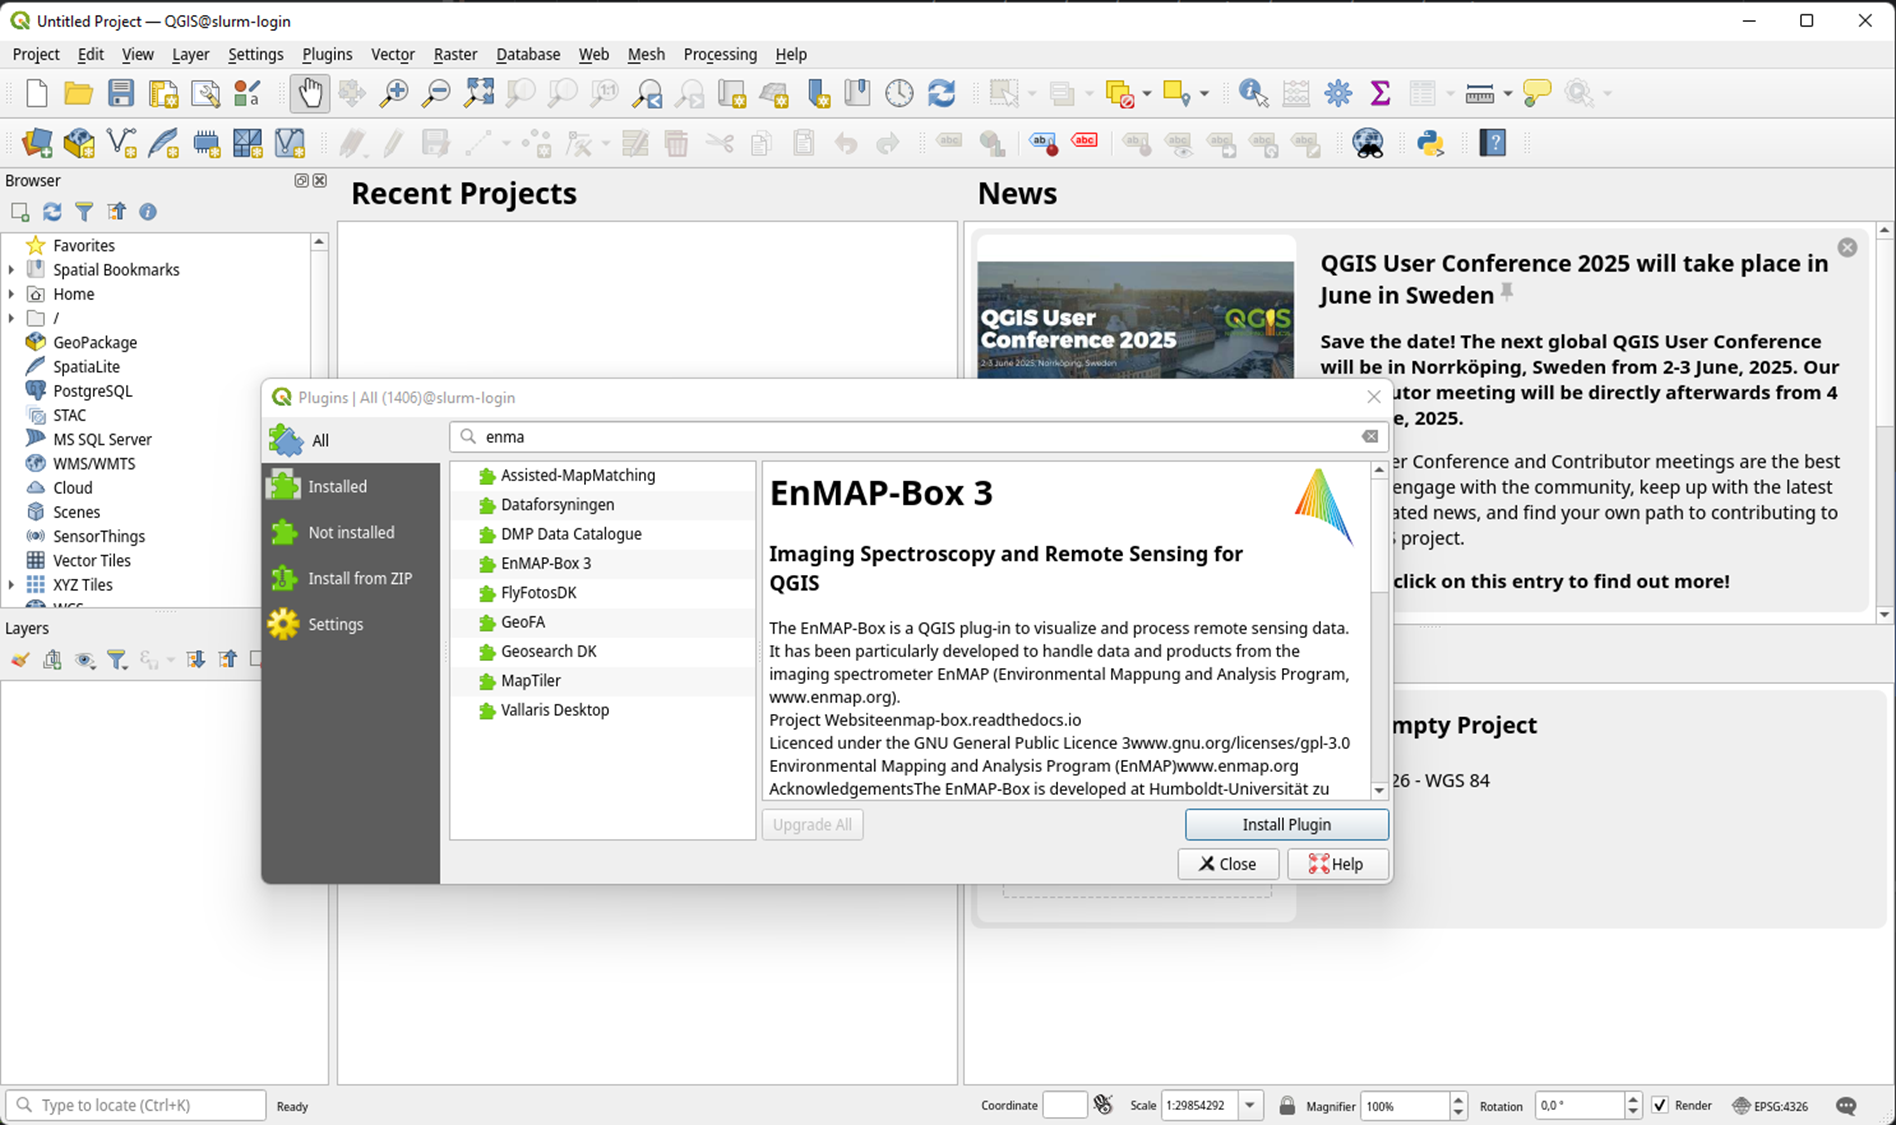
qgis&to open QGIS in an X-WindowGo to Plugins -> Manage and Install Plugins
Search for ‘EnMAP-Box’
Click on ‘Install Plugin’
To install QGIS plugins from CLI only, we fist install the https://github.com/3liz/qgis-plugin-manager
# define the path where your plugins are stored
export QGIS_PLUGINPATH=~/.local/share/QGIS/QGIS3/profiles/default/python/plugins
mkdir $QGIS_PLUGINPATH

# install the 3Liz qgis-plugin-manager
conda install qgis-plugin-manager
qgis-plugin-manager init
qgis-plugin-manager update

# install the EnMAP-Box
qgis-plugin-manger install 'EnMAP-Box 3'
Check that the EnMAP-Box is installed and their processing algorithms available on your CLI:
Call
qgis_process plugins listto see which plugins are loaded and available.jakimowb@slurm-login:~> qgis_process plugins list load /home/geographie/jakimowb/.local/share/QGIS/QGIS3/profiles/default/python/plugins/enmapboxplugin/enmapbox/enmapboxresources_rc.py load /home/geographie/jakimowb/.local/share/QGIS/QGIS3/profiles/default/python/plugins/enmapboxplugin/enmapbox/coreapps/enmapboxapplications/ressources_rc.py load /home/geographie/jakimowb/.local/share/QGIS/QGIS3/profiles/default/python/plugins/enmapboxplugin/enmapbox/qgispluginsupport/qps/qpsresources_rc.py <frozen importlib._bootstrap>:488: RuntimeWarning: numpy.ufunc size changed, may indicate binary incompatibility. Expected 216 from C header, got 232 from PyObject Problem with GRASS installation: GRASS was not found or is not correctly installed Available plugins (* indicates loaded plugins which implement Processing providers) enmapboxplugin * grassprovider * processing
If necessary, enable the EnMAP-Box plugin with
qgis_process plugins enable enmapboxplugin:jakimowb@slurm-login:~> qgis_process plugins enable enmapboxplugin Enabling plugin: "enmapboxplugin" load /home/geographie/jakimowb/.local/share/QGIS/QGIS3/profiles/default/python/plugins/enmapboxplugin/enmapbox/enmapboxresources_rc.py load /home/geographie/jakimowb/.local/share/QGIS/QGIS3/profiles/default/python/plugins/enmapboxplugin/enmapbox/coreapps/enmapboxapplications/ressources_rc.py load /home/geographie/jakimowb/.local/share/QGIS/QGIS3/profiles/default/python/plugins/enmapboxplugin/enmapbox/qgispluginsupport/qps/qpsresources_rc.py <frozen importlib._bootstrap>:488: RuntimeWarning: numpy.ufunc size changed, may indicate binary incompatibility. Expected 216 from C header, got 232 from PyObject Enabled enmapboxplugin (EnMAP-Box 3) Available plugins (* indicates enabled plugins which implement Processing providers) * enmapboxplugin * grassprovider * processing
Now list the processing algorithms provided by the EnMAP-Box:
qgis_process list | grep 'enmapbox'
<frozen importlib._bootstrap>:488: RuntimeWarning: numpy.ufunc size changed, may indicate binary incompatibility. Expected 216 from C header, got 232 from PyObject
Problem with GRASS installation: GRASS was not found or is not correctly installed
enmapbox:AggregateRasterLayerBands      Aggregate raster layer bands
enmapbox:AggregateRasterLayers  Aggregate raster layers
enmapbox:ApplyMaskLayerToRasterLayer    Apply mask layer to raster layer
enmapbox:Build3DCube    Build 3D Cube
enmapbox:ClassFractionLayerFromCategorizedLayer Class fraction layer from categorized layer
enmapbox:ClassSeparabilityReport        Class separability report
enmapbox:ClassificationLayerAccuracyAndAreaReportForStratifiedRandomSampling    Classification layer accuracy and area report (for stratified random sampling)
enmapbox:ClassificationLayerAccuracyReport      Classification layer accuracy report
enmapbox:ClassificationLayerFromClassProbabilityfractionLayer   Classification layer from class probability/fraction layer
enmapbox:ClassificationLayerFromRenderedImage   Classification layer from rendered image
enmapbox:ClassificationWorkflow Classification workflow
enmapbox:ClassifierFeatureRankingPermutationImportance  Classifier feature ranking (permutation importance)
enmapbox:ClassifierPerformanceReport    Classifier performance report
enmapbox:ConvexHullAndContinuumremoval  Convex hull and continuum-removal
enmapbox:CreateClassificationDatasetFromCategorizedRasterLayerAndFeatureRaster  Create classification dataset (from categorized raster layer and feature raster)
enmapbox:CreateClassificationDatasetFromCategorizedSpectralLibrary      Create classification dataset (from categorized spectral library)
enmapbox:CreateClassificationDatasetFromCategorizedVectorLayerAndFeatureRaster  Create classification dataset (from categorized vector layer and feature raster)
enmapbox:CreateClassificationDatasetFromCategorizedVectorLayerWithAttributeTable        Create classification dataset (from categorized vector layer with attribute table)
enmapbox:CreateClassificationDatasetFromJsonFile        Create classification dataset (from JSON file)
enmapbox:CreateClassificationDatasetFromPythonCode      Create classification dataset (from Python code)
enmapbox:CreateClassificationDatasetFromTableWithCategoriesAndFeatureFields     Create classification dataset (from table with categories and feature fields)
enmapbox:CreateClassificationDatasetFromTextFiles       Create classification dataset (from text files)
. . .
7.3. Run EnMAP-Box GUI
Now we like to start the EnMAP-Box GUI:
Call
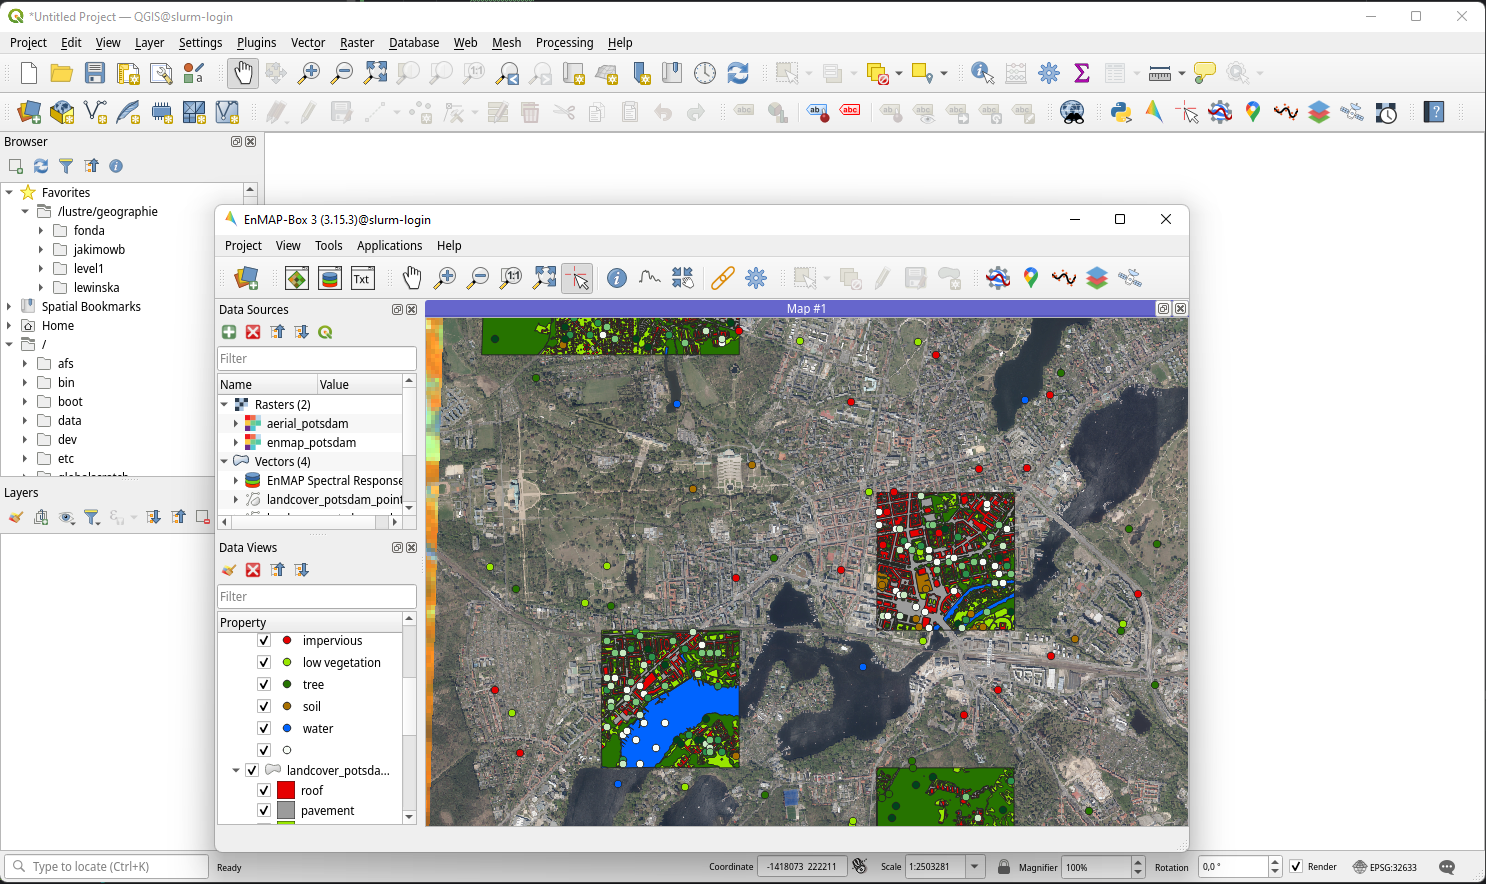
qgis&to open QGIS in an X-Window.Click the EnMAP-Box icon
 to start the EnMAP-Box
Click Project->Add Exampledata to download and visualize the EnMAP-Box example data.
7.4. Run Processing Algorithms
Let’s create a working directory and download some example data:
DIR_DATA=/lustre/geographie/jakimowb/data
mkdir -p $DIR_DATA
cd $DIR_DATA
wget -O enmapdata.zip https://box.hu-berlin.de/f/c35a6b0655c54d518aab/?dl=1
unzip enmapdata.zip -d enmapdata

# list all *METADATA.XML files
find . -type f -name '*METADATA.XML'
Select the METADATA.XML path and run the EnMAP-Box import EnMAP L2A algorithm. It will create a single raster file from the L2A product that contains the reflectance values of the EnMAP bands and enriches this raster with metadata for QGIS and the EnMAP-Box.
PATH_L2A=enmapdata/ENMAP01-____L2A-DT0000001867_20220724T104526Z_008_V010302_20230628T165614Z-METADATA.XML
qgis_process run enmapbox:ImportEnmapL2AProduct \
   --detectorOverlap=1 \
   --file=$PATH_L2A \
   --outputEnmapL2ARaster=$DIR_DATA/enmap_l2a.vrt
The output should look like:
load /home/geographie/jakimowb/.local/share/QGIS/QGIS3/profiles/default/python/plugins/enmapboxplugin/enmapbox/enmapboxresources_rc.py
load /home/geographie/jakimowb/.local/share/QGIS/QGIS3/profiles/default/python/plugins/enmapboxplugin/enmapbox/coreapps/enmapboxapplications/ressources_rc.py
load /home/geographie/jakimowb/.local/share/QGIS/QGIS3/profiles/default/python/plugins/enmapboxplugin/enmapbox/qgispluginsupport/qps/qpsresources_rc.py
<frozen importlib._bootstrap>:488: RuntimeWarning: numpy.ufunc size changed, may indicate binary incompatibility. Expected 216 from C header, got 232 from PyObject
Problem with GRASS installation: GRASS was not found or is not correctly installed

----------------
Inputs
----------------

file:   enmapdata/ENMAP01-____L2A-DT0000001867_20220724T104526Z_008_V010302_20230628T165614Z-METADATA.XML
outputEnmapL2ARaster:   /lustre/geographie/jakimowb/data/enmap_l2a.tif


Create Raster [1275x1240x206](Float32) -co INTERLEAVE=BAND COMPRESS=LZW TILED=YES BIGTIFF=YES /lustre/geographie/jakimowb/data/enmap_l2a.tif
0...10...20...30...40...50...60...70...80...90...100 - done.
Execution completed in 19.3 seconds
Results: {'outputRaster': '/lustre/geographie/jakimowb/data/enmap_l2a.tif'}
Execution completed in 22.61 seconds

----------------
Results
----------------

outputEnmapL2ARaster:   /lustre/geographie/jakimowb/data/enmap_l2a.tif
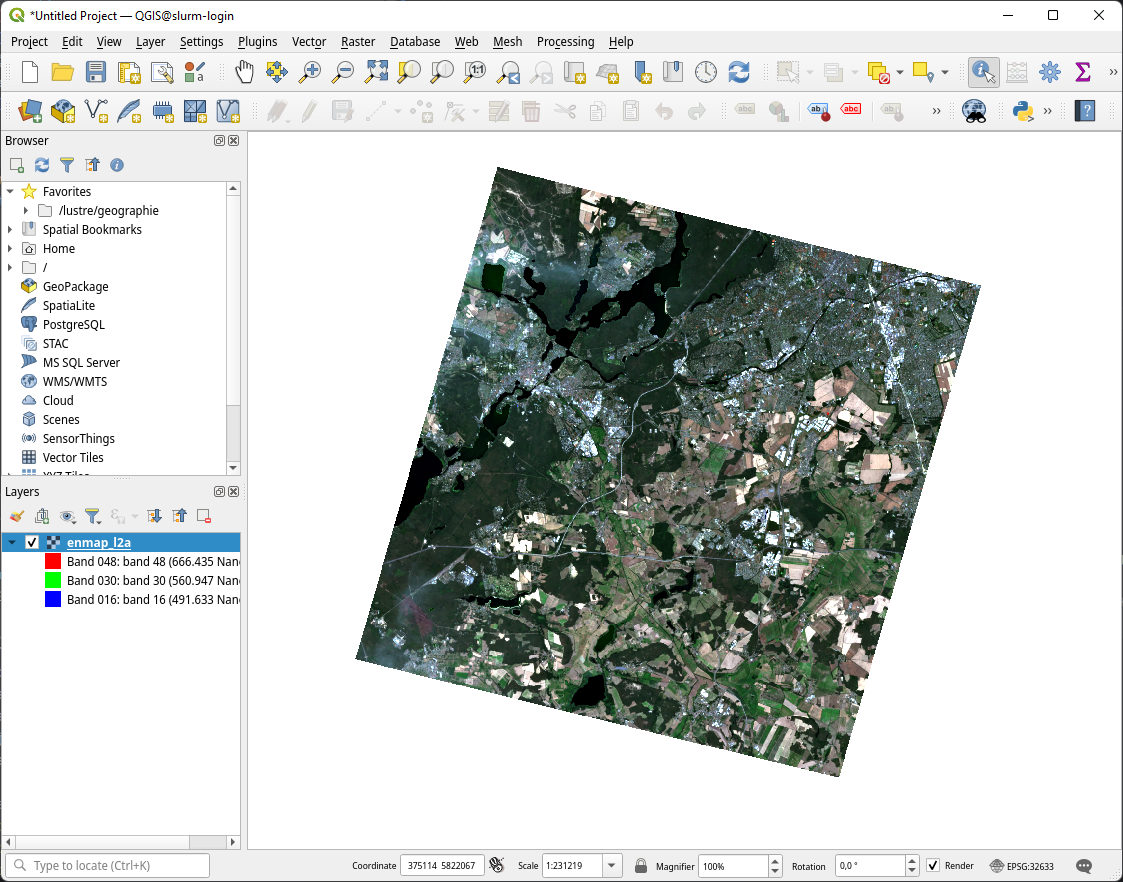
Now open the image in QGIS:
qgis $DIR_DATA/enmap_l2a.vrt&
7.5. Run Processing Models
The QGIS Model Designer allows you to create QGIS Processing Models to describe comprehensive workflows that combine EnMAP-Box and other QGIS algorithms.
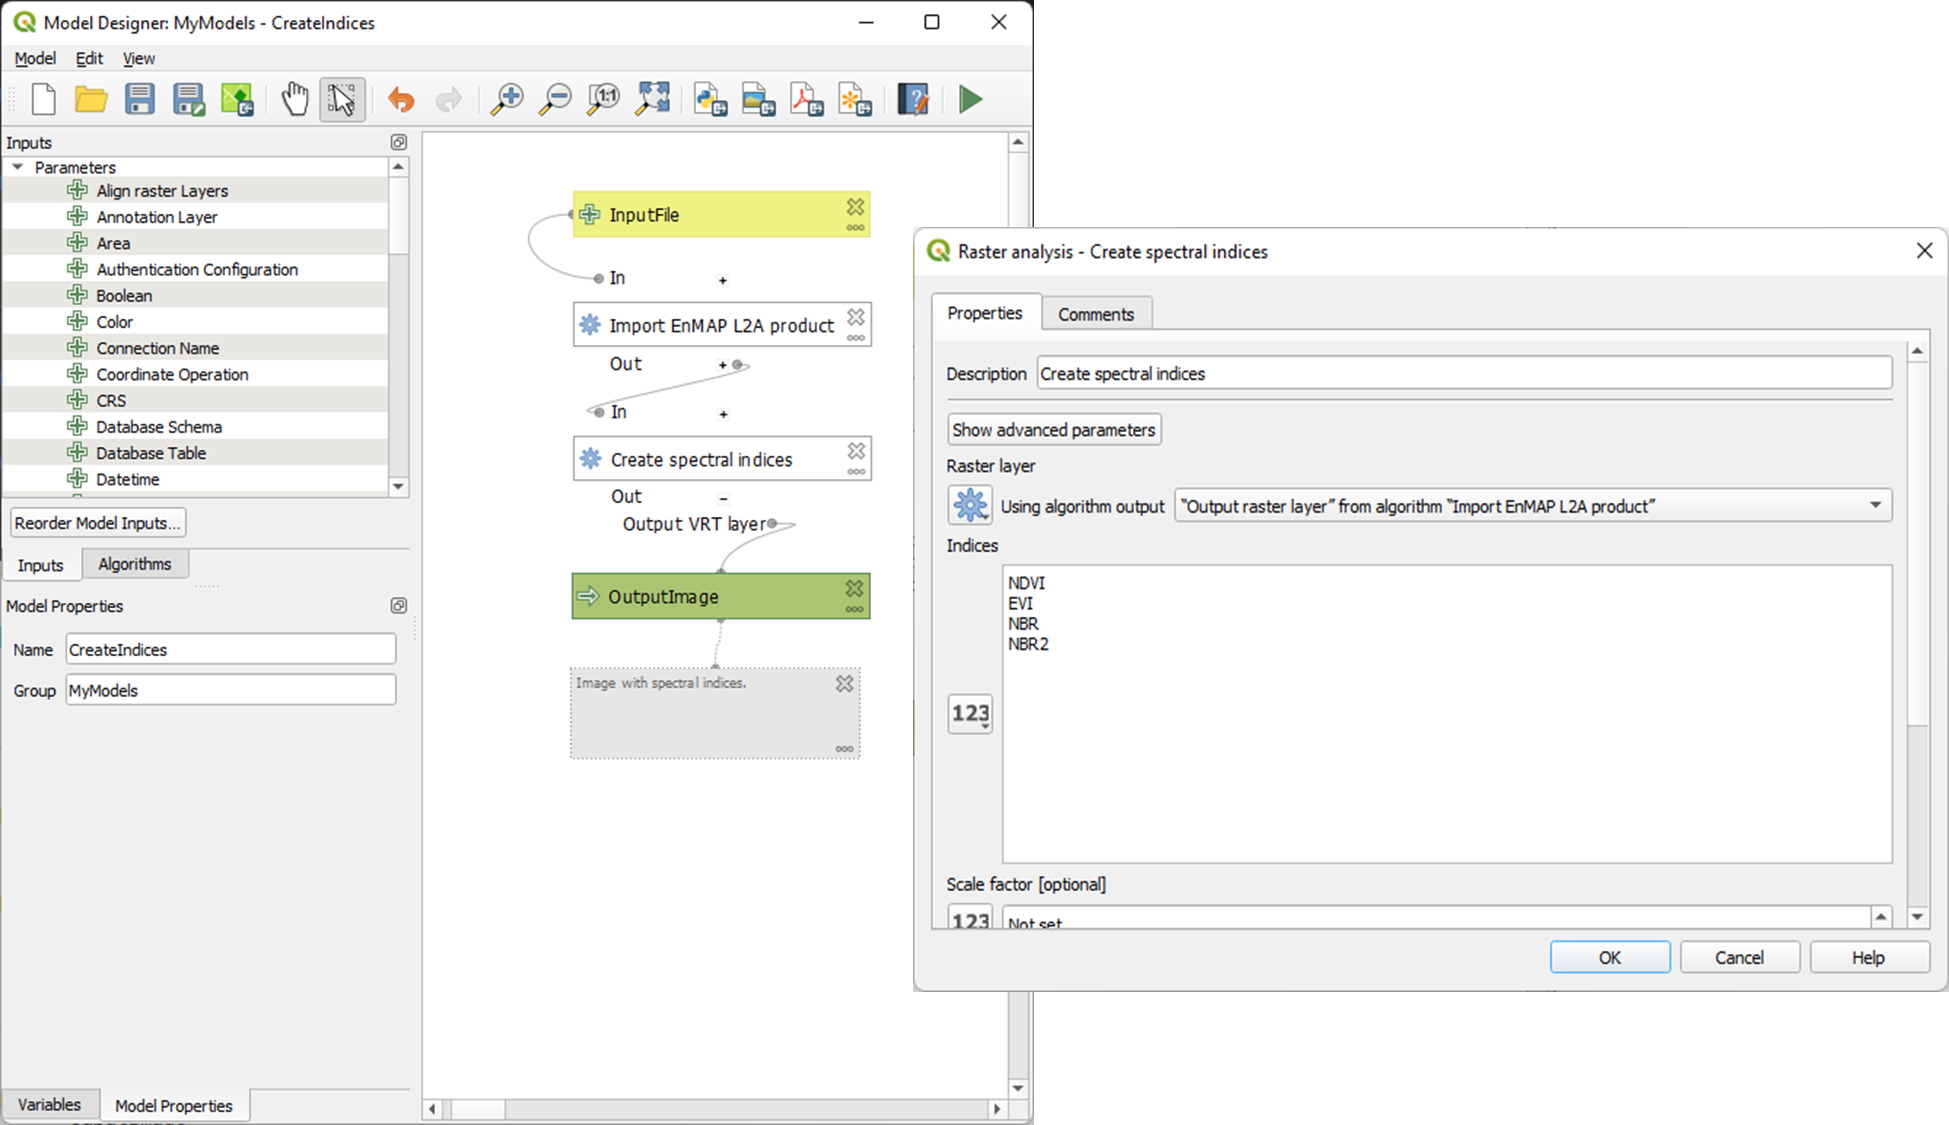
These models can be saved an shared in *.model3 files. Download the CreateSpectralIndices.model3
and show its parameters:
>qgis_process help ~/CreateSpectralIndices.model3

   CreateIndices (CreateIndices)

----------------
Description
----------------


----------------
Arguments
----------------

inputfile: InputFile
        Argument type:  file
        Acceptable values:
                - Path to a file
outputimage: OutputImage
        Argument type:  rasterDestination
        Acceptable values:
                - Path for new raster layer

----------------
Outputs
----------------

outputimage: <outputRaster>
        OutputImage
To run it, call:
> qgis_process run ~/CreateSpectralIndices.model3 \
      -- inputfile=ENMAP01-____L2A-DT0000001867_20220724T104526Z_008_V010302_20230628T165614Z-METADATA.XML \
         outputimage=~/myresult.tif

----------------
Inputs
----------------

inputfile:      ENMAP01-____L2A-DT0000001867_20220724T104526Z_008_V010302_20230628T165614Z-METADATA.XML
outputimage:    /home/geographie/jakimowb/myresult.vrt


Create Raster [1275x1240x218](Float32) -co INTERLEAVE=BAND COMPRESS=LZW TILED=YES BIGTIFF=YES /tmp/processing_zzyKzi/0854a4cf4d624d69803deeb2ce382e00/outputEnmapL2ARaster.tif
0...10...20...30...40...50
Execution completed in 18.73 seconds
Results: {'outputRaster': '/tmp/processing_zzyKzi/0854a4cf4d624d69803deeb2ce382e00/outputEnmapL2ARaster.tif'}
Execution completed in 21.99 seconds
gdal_vrt_module_0x557a0e002550:12: RuntimeWarning: invalid value encountered in divide
gdal_vrt_module_0x557a0aca6bc0:12: RuntimeWarning: invalid value encountered in divide
gdal_vrt_module_0x557a12d68350:12: RuntimeWarning: invalid value encountered in divide
gdal_vrt_module_0x557a0dfdbec0:12: RuntimeWarning: invalid value encountered in divide
Execution completed in 2.37 seconds
...60...70...80...90...100 - done.
Model processed OK. Executed 2 algorithm(s) total in 24.479 s.

----------------
Results
----------------

outputimage:    /home/geographie/jakimowb/myresult.tif
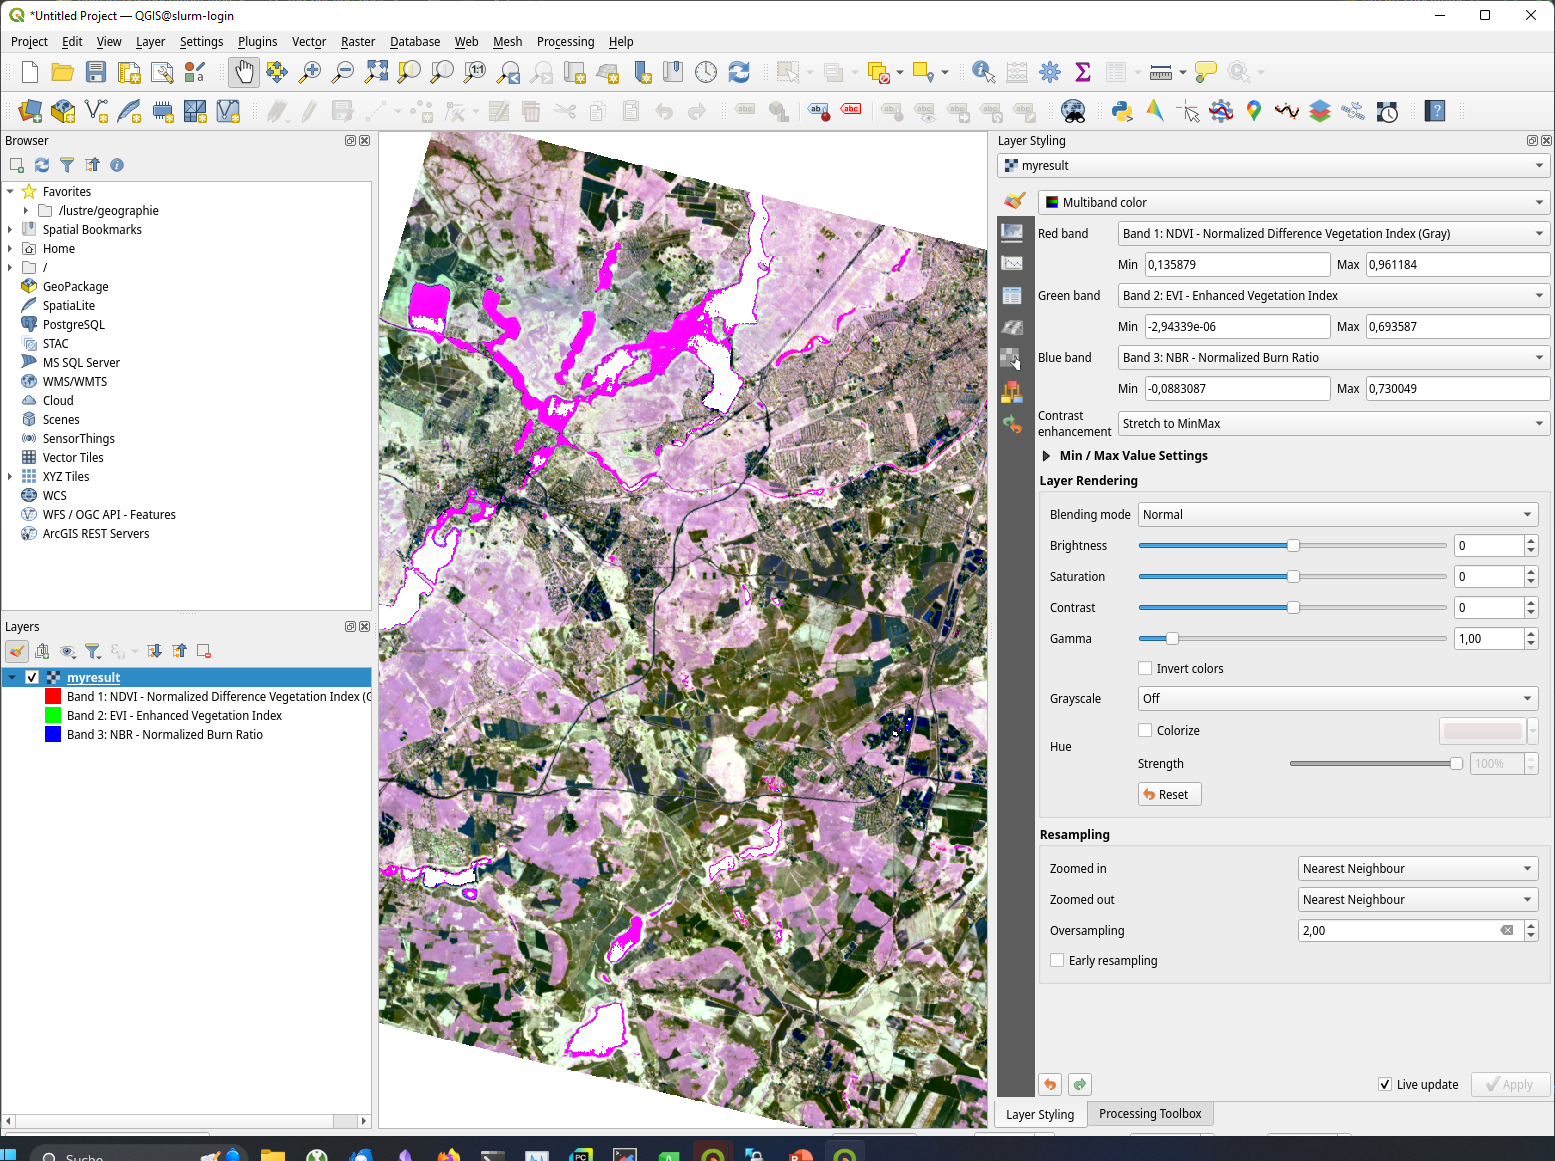
Call qgis ~/myresult.tif to visualize the created image in QGIS:
7.6. SLURM Workload Manager
The SLURM workload manager allows to schedule and execute processing jobs for large and small Linux clusters. To cite from the SLURM project:
First, it allocates exclusive and/or non-exclusive access to resources (compute nodes) to users for some duration of time so they can perform work.
Second, it provides a framework for starting, executing, and monitoring work (normally a parallel job) on the set of allocated nodes.
Finally, it arbitrates contention for resources by managing a queue of pending work.
In the next section we use SLURM to schedule and run the time-consuming processes of EnMAP-data extraction and import.
7.7. Example: Import EnMAP L2A data
7.7.1. Download EnMAP products
We assume that a lot of EnMAP Level 2 data has been ordered in the EnMAP Data Access Portal.
are now several tar.gz file are ready to be downloaded from download.dsda.dlr.de.
First, we create a folder to download these files. As we will refer to in the next steps, we save the folder path in a variable:
mkdir -p ~/mydata/enmap_input
To download the data from the FTP server we can use the Sophisticated file transfer program - lftp command. Replace <user> with your personal user account in the EnMAP Data Access Portal:
# connect to FTP server and enter your password
lftp -u <user>@download.dsda.dlr.de
Password: <type your password>

# list files available for download
lftp <user>@download.dsda.dlr.de:~>ls
-rw-r--r--   1 7385     7385     1089871343 Jan  3 13:49 dims_op_oc_oc-en_702052263_1.tar.gz
-rw-r--r--   1 7385     7385     4871929662 Jan  3 13:53 dims_op_oc_oc-en_702052263_2.tar.gz
-rw-r--r--   1 7385     7385     1419200394 Jan  2 15:18 dims_op_oc_oc-en_702052361_1.tar.gz
-rw-r--r--   1 7385     7385     2779919913 Jan  2 20:08 dims_op_oc_oc-en_702052407_1.tar.gz
-rw-r--r--   1 7385     7385     4662669786 Jan  2 20:10 dims_op_oc_oc-en_702052407_2.tar.gz

# download all *.tar.gz files with 4 file at the same time to your local $INPUT_DIR
lftp <user>@download.dsda.dlr.de:~>mirror --parallel=4 -v . ~/mydata/enmap_input
Transferring file `dims_op_oc_oc-en_702052263_1.tar.gz'
Transferring file `dims_op_oc_oc-en_702052263_2.tar.gz'
Transferring file `dims_op_oc_oc-en_702052361_1.tar.gz'
Transferring file `dims_op_oc_oc-en_702052407_1.tar.gz'
Transferring file `dims_op_oc_oc-en_702052407_2.tar.gz'
`dims_op_oc_oc-en_702052263_2.tar.gz' at 1758625792 (36%) 44.45M/s eta:69s [Receiving data/TLS]

# finally call exit to leave the lftp shell
lftp <user>@download.dsda.dlr.de:~>exit
Now check the *.tar.gz files in INPUT_DIR:
> $INPUT_DIR=~/mydata/enmap_input
> ls -lh $INPUT_DIR
total 185G
-rw-r--r-- 1 jakimowb zwei 4.5G Aug 13 17:37 dims_op_oc_oc-en_701696243_2.tar.gz
-rw-r--r-- 1 jakimowb zwei 1.8G Aug 13 17:29 dims_op_oc_oc-en_701696349_1.tar.gz
-rw-r--r-- 1 jakimowb zwei 4.7G Aug 13 17:31 dims_op_oc_oc-en_701696349_2.tar.gz
-rw-r--r-- 1 jakimowb zwei 2.1G Aug 13 17:26 dims_op_oc_oc-en_701696455_1.tar.gz
-rw-r--r-- 1 jakimowb zwei 4.4G Aug 13 17:28 dims_op_oc_oc-en_701696455_2.tar.gz
-rw-r--r-- 1 jakimowb zwei 1.7G Aug 13 17:21 dims_op_oc_oc-en_701696615_1.tar.gz
# <many more>
Each *.tar.gz file contains one or more EnMAP Level 2 products and auxiliary information.
These files can be listed with:
> tar -tzf dims_op_oc_oc-en_701696137_1.tar.gz
dims_op_oc_oc-en_701696137_1/
dims_op_oc_oc-en_701696137_1/tools/
dims_op_oc_oc-en_701696137_1/tools/defcopyright.html
dims_op_oc_oc-en_701696137_1/tools/EnMAP_Data_License_v1.1_final.pdf
dims_op_oc_oc-en_701696137_1/tools/EnMAP_Data_License_v1.1_final.pdf.tooldes
dims_op_oc_oc-en_701696137_1/tools/iif.xsd
dims_op_oc_oc-en_701696137_1/tools/iif.xsd.tooldes
dims_op_oc_oc-en_701696137_1/tools/tf.xsd
dims_op_oc_oc-en_701696137_1/tools/tf.xsd.tooldes
dims_op_oc_oc-en_701696137_1/tools/leiste.gif
dims_op_oc_oc-en_701696137_1/tools/logo_dlr.jpg
dims_op_oc_oc-en_701696137_1/tools/logo_dfd.jpg
dims_op_oc_oc-en_701696137_1/tools/erde_weiss_small.gif
dims_op_oc_oc-en_701696137_1/ENMAP.HSI.L2A/
dims_op_oc_oc-en_701696137_1/ENMAP.HSI.L2A/ENMAP01-____L2A-DT0000014911_20230428T093524Z_016_V010402_20240809T151155Z.ZIP
dims_op_oc_oc-en_701696137_1/ENMAP.HSI.L2A/ENMAP01-____L2A-DT0000014911_20230428T093533Z_018_V010402_20240809T145654Z.ZIP
dims_op_oc_oc-en_701696137_1/ENMAP.HSI.L2A/ENMAP01-____L2A-DT0000014911_20230428T093520Z_015_V010402_20240809T151634Z.ZIP
dims_op_oc_oc-en_701696137_1/ENMAP.HSI.L2A/ENMAP01-____L2A-DT0000014911_20230428T093529Z_017_V010402_20240809T145835Z.ZIP
dims_op_oc_oc-en_701696137_1/ENMAP.HSI.L2A/ENMAP01-____L2A-DT0000014911_20230428T093506Z_012_V010402_20240809T152833Z.ZIP
dims_op_oc_oc-en_701696137_1/iif/
dims_op_oc_oc-en_701696137_1/iif/dims_nz_pl_dfd_XXXXB00000000681141327206_iif.xml
dims_op_oc_oc-en_701696137_1/iif/dims_nz_pl_dfd_XXXXB00000000681141326695_iif.xml
dims_op_oc_oc-en_701696137_1/iif/dims_nz_pl_dfd_XXXXB00000000681141327597_iif.xml
dims_op_oc_oc-en_701696137_1/iif/dims_nz_pl_dfd_XXXXB00000000681141326969_iif.xml
dims_op_oc_oc-en_701696137_1/iif/dims_nz_pl_dfd_XXXXB00000000681141328372_iif.xml
dims_op_oc_oc-en_701696137_1/readme.html
7.7.2. Extract, Import, Queue
In order to visualize and analyze the EnMAP data, we would like for each *.tar.gz file to:
extract all ENMAP01_*.ZIP files,
unzip each extracted ENMAP01_*.ZIP file,
create a single raster image with reflectance values and band-metadata that can be used in QGIS and the EnMAP-Box,
cleanup unzipped *.tar.gz and ENMAP01_*.ZIP files.
We can use the extract_enmap_tgz.sh script to run step 1-4 for a single *.tar.gz file.
However, as the extraction and import can take a while, we do not like to simply loop over all files, but extract them
in parallel. We can do so using two other scripts: extract_all.slurm defines a SLURM job and extract_all.sh that starts it.
This script extracts a single *.tar.gz file and uncompresses the contained ZIP files that contain EnMAP image data. After that, the EnMAP-Box enmapbox:ImportEnmapL2AProduct algorithm is used to create an image that is easy to visualize in QGIS and the EnMAP-Box.
#!/bin/bash
# A script to extract EnMAP Level 2A *.tar.gz archives

if [ "$#" -ne 2 ]; then
    echo "Usage: $0 FILE OUTPUT_DIR"
    exit 1
fi

# Assign arguments to variables
FILE=$1
OUTPUT_DIR=$2

# Validate FILE
if [ ! -f "$FILE" ]; then
    echo "Error: FILE '$FILE' does not exist or is not a regular file."
    exit 2
fi

# Validate OUTPUT_DIR
if [ ! -d "$OUTPUT_DIR" ]; then
    echo "Error: OUTPUT_DIR '$OUTPUT_DIR' does not exist or is not a directory."
    exit 3
fi

DIR_TMP="$OUTPUT_DIR/$(basename "$FILE" .tar.gz)"
mkdir -p $DIR_TMP
echo "DIR_TMP=$DIR_TMP"

echo "# Step 1: Extract $FILE to $DIR_TMP..."
tar -xzvf "$FILE" -C $DIR_TMP --wildcards '*.ZIP'

ls -a $DIR_TMP

echo "# Step 2: Unzip zip files below $DIR_TMP"
find -L "$DIR_TMP" -name "ENMAP01*.ZIP" -type f

mapfile -t ZIPFILES < <(find -L "$DIR_TMP" -name "ENMAP01*.ZIP" -type f)
DIR_UNZIPPED="$DIR_TMP/unzipped"
mkdir -p $DIR_UNZIPPED
echo "DIR_UNZIPPED=$DIR_UNZIPPED"

for zip_file in "${ZIPFILES[@]}"; do
  echo "unzip $zip_file..."
  unzip -o "$zip_file" -d "$DIR_UNZIPPED"
done

echo "# Step 3: import the L2A product as image to be used with QGIS / EnMAP-Box"
mapfile -t METADATAFILES < <(find "$DIR_UNZIPPED" -name "ENMAP01*-METADATA.XML" -type f)
echo "Found ${#METADATAFILES[@]} *.METADATA.XML files:"

for xml_file in "${METADATAFILES[@]}"; do
  tif_file="${xml_file%METADATA.XML}-IMAGE_L2A.tif"

  printf "Import $xml_file \nto $tif_file"

  qgis_process run enmapbox:ImportEnmapL2AProduct -- \
           file=$xml_file \
           setBadBands=true \
           excludeBadBands=true \
           detectorOverlap=0 \
           outputEnmapL2ARaster=$tif_file

done


echo "# Step 4: move the EnMAP Scene folder to output directory and cleanup everything"
rsync -a "$DIR_UNZIPPED/" "$OUTPUT_DIR"
rm -r $DIR_TMP
This script defines the SLURM job that extracts each *.tar.gz in a separated slurm job array task:
#!/bin/bash
#SBATCH --ntasks=1                    # Run on a single CPU
#SBATCH --mem=4gb                     # Job memory request
#SBATCH --partition=standard
#SBATCH --account=jakimowb
#SBATCH --output=job_output_%A_%a.log
#SBATCH --error=job_error_%A_%a.log
#SBATCH --cpus-per-task=1             # CPUs per task


JOBLIST=$1
OUTPUT_DIR=$2

# ensure that the standard environmental settings are available
source ~/.bashrc

# activate the enmapbox conda environment
module load miniforge3
conda activate enmapbox
export QT_QPA_PLATFORM=offscreen
mkdir -p $OUTPUT_DIR


FILE=$(sed -n "$((SLURM_ARRAY_TASK_ID + 1))p" "$JOBLIST")
if [ -z "$FILE" ]; then
    echo "No file found for SLURM_ARRAY_TASK_ID=$SLURM_ARRAY_TASK_ID"
    exit 1
fi


# Process the file
echo "Import EnMAP images from $FILE"
source extract_enmap_tgz.sh "$FILE" "$OUTPUT_DIR"
echo "SLURM job finished"
This script adds the slurm job and all its sub-tasks to the SLURM job queue.
The last line of the
extract_all.shscript calls sbatch to send theextrac.slurmto the slurm cluster. The parameter--array=0-$(($NUM_FILES - 1))%4creates a job array for n=$NUM_FILES jobs, of which up to 4 are processed in parallel.#!/bin/bash DIR_INPUT=~/mydata/enmap_input DIR_OUTPUT=~/mydata/enmap_l2_tif DIR_LOGS=~/SLURM_LOGS JOBLIST=~/joblist.txt mkdir -p $DIR_LOGS mkdir -p $DIR_OUTPUT # create a joblist find "$DIR_INPUT" -name "*.tar.gz" -type f > "$JOBLIST" NUM_FILES=$(wc -l < "$JOBLIST") echo "Found $NUM_FILES *.tar.gz files." if [ "$NUM_FILES" -eq 0 ]; then echo "No *.tar.gz files found. Exiting." #exit 1 fi # Submit the Slurm job array echo "Submitting Slurm job array with $NUM_FILES files..." sbatch \ --array=0-$(($NUM_FILES - 1))%4 \ --output=$DIR_LOGS/job_output_%A_%a.log \ --error=$DIR_LOGS/job_error_%A_%a.log \ extract.slurm "$JOBLIST" "$DIR_OUTPUT"
Note
SLURM jobs are executed on nodes. These nodes may provide a different environment that that where you tested your processing script. To inspect the environment on which SLURM will processes your script, you can create a new node with srun and open an interactive shell:
>srun --nodes=1 --exclusive --slurmd-debug debug2 --pty bash -i
user@slurm-exec-019:~> which unzip
/usr/bin/unzip
Obviously the unzip command is available on this slurm execution node slurm-exec-019.
7.7.3. Monitor job status
The squeue command can be used to inspect the job status:
> squeue -u $USER
JOBID PARTITION     NAME     USER ST       TIME  NODES NODELIST(REASON)
19523_0  standard extract. jakimowb  R       9:45      1 slurm-exec-029
19523_1  standard extract. jakimowb  R       9:45      1 slurm-exec-029
19523_2  standard extract. jakimowb  R       9:45      1 slurm-exec-029
19523_3  standard extract. jakimowb  R       9:45      1 slurm-exec-029
Actually 4 jobs are running in parallel (ST = R), as defined when starting
the job with --array=0-$(($NUM_FILES - 1))%4.
Using the job id JOB_ID=19523, we can log-in to a job session with srun:
user@slurm-login:~> srun --jobid $JOB_ID --pty bash
user@slurm-exec-013:~>
Similar, jobs can be canceled with scancel:
user@slurm-login:~> scancel $JOB_ID     # to cancel the entire job
user@slurm-login:~> scancel $JOB_ID_3   # to cancel the the job set with sub-id 3
The saact command allows you to display statistics for all jobs and job steps:
>user@slurm-login:~> sacct -j $JID
JobID           JobName  Partition    Account  AllocCPUS      State ExitCode
------------ ---------- ---------- ---------- ---------- ---------- --------
19667_0      extract.s+   standard   user          1    RUNNING      0:0
19667_0.bat+      batch              user          1    RUNNING      0:0
19667_1      extract.s+   standard   user          1    RUNNING      0:0
19667_1.bat+      batch              user          1    RUNNING      0:0
19667_2      extract.s+   standard   user          1    RUNNING      0:0
19667_2.bat+      batch              user          1    RUNNING      0:0
19667_3      extract.s+   standard   user          1    RUNNING      0:0
19667_3.bat+      batch              user          1    RUNNING      0:0
19667_4      extract.s+   standard   user          1  COMPLETED      0:0
19667_4.bat+      batch              user          1  COMPLETED      0:0
19667_5      extract.s+   standard   user          1    RUNNING      0:0
19667_5.bat+      batch              user          1    RUNNING      0:0
19667_6      extract.s+   standard   user          1    RUNNING      0:0
19667_6.bat+      batch              user          1    RUNNING      0:0
The --format parameter allows to specify the outputs, e.g. to show how long each single step took:
7.8. Notes
7.8.1. QT_QPA_PLATFORM
Qt apps like QGIS and the EnMAP-Box expect a graphical interface where they can draw a graphical user interface (windows, widgets, pixel). If your Qt app raises an error like:
qt.qpa.xcb: could not connect to display localhost:14.0
qt.qpa.plugin: Could not load the Qt platform plugin "xcb" in "" even though it was found.
This application failed to start because no Qt platform plugin could be initialized. Reinstalling the application may fix this problem.

Available platform plugins are: eglfs, minimal, minimalegl, offscreen, vnc, webgl, xcb.
it means that Qt can’t connect to the expected graphical interface. In this case the expected Qt Platform Abstraction (QPA) layer - the QXcbIntegrationPlugin `xcb plugin for Linux/X11, is not available, because no X Server has been started.
If screen devices are not available or not needed, as on SLURM nodes, it may be required to change the defauls QT_QPA_PLATFORM:
export QT_QPA_PLATFORM=offscreen
Be aware that if set to offscreen, Qt applications won’t show any GUI interface. This may cause errors like the following, when starting QGIS:
>export QT_QPA_PLATFORM=offscreen
>qgis
[New LWP 9667]
[New LWP 9673]
[Thread debugging using libthread_db enabled]
Using host libthread_db library "/lib64/libthread_db.so.1".
0x00007f0568e9ec1f in wait4 () from /lib64/libc.so.6
[Current thread is 1 (Thread 0x7f055857ea00 (LWP 9513))]
#0  0x00007f0568e9ec1f in wait4 () from /lib64/libc.so.6
No symbol table info available.
#1  0x0000562ff9884824 in qgisCrash(int) ()
No symbol table info available.
#2  <signal handler called>
No symbol table info available.
#3  0x00007f056e61268c in QgsClipboard::hasFormat(QString const&) const () from /mnt/lustre/scratch/geographie/jakimowb/conda_envs/enmapbox/bin/../lib/libqgis_app.so.3.40.1
No symbol table info available.
#4  0x00007f056e58bea5 in QgisApp::activateDeactivateLayerRelatedActions(QgsMapLayer*) () from /mnt/lustre/scratch/geographie/jakimowb/conda_envs/enmapbox/bin/../lib/libqgis_app.so.3.40.1
No symbol table info available.
#5  0x00007f056e59ec11 in QgisApp::QgisApp(QSplashScreen*, bool, bool, bool, QString const&, QString const&, QWidget*, QFlags<Qt::WindowType>) () from /mnt/lustre/scratch/geographie/jakimowb/conda_envs/enmapbox/bin/../lib/libqgis_app.so.3.40.1
No symbol table info available.
#6  0x0000562ff987ffa1 in main ()
No symbol table info available.
[Inferior 1 (process 9513) detached]
gdb returned 0
To reset QT_QPA_PLATFORM to its system default, call:
unset QT_QPA_PLATFORM
7.8.2. Inspect a SLURM node
SLURM job are executed on SLURM nodes. These nodes may provide an environment that differs to that where you have tested your tasks before. Therefore, it can be useful to log-in to node and inspect its environment interactively, e.g. to find our why your slurm script does not run on a SLURM node.
To create a new SLURM node and connect an interactive shell, call:
srun --nodes=1 --exclusive --pty bash -i
7.9. References
This tutorial is largely based on own experience and the following documentations:
Source |
Link |
|---|---|
EnMAP-Box Installation Guide |
|
QGIS processing framework |
https://docs.qgis.org/3.34/en/docs/user_manual/processing/index.html Graser & Olaya 2015, Processing: A Python Framework for the Seamless Integration of Geoprocessing Tools in QGIS https://doi.org/10.3390/ijgi4042219 . |
Qt 5.15 |
|
SLURM Workload Manager |
|
High Performance Computing HU-Berlin |