The DLR Earth Observation Center (EOC) Geoservice provides programmatic and immediate access to Earth Observation datasets, including EnMAP Hyperspectral Imagery (HSI), without the need for manual downloading through the web portal.
To access and download EnMAP data, you must have a registered account.
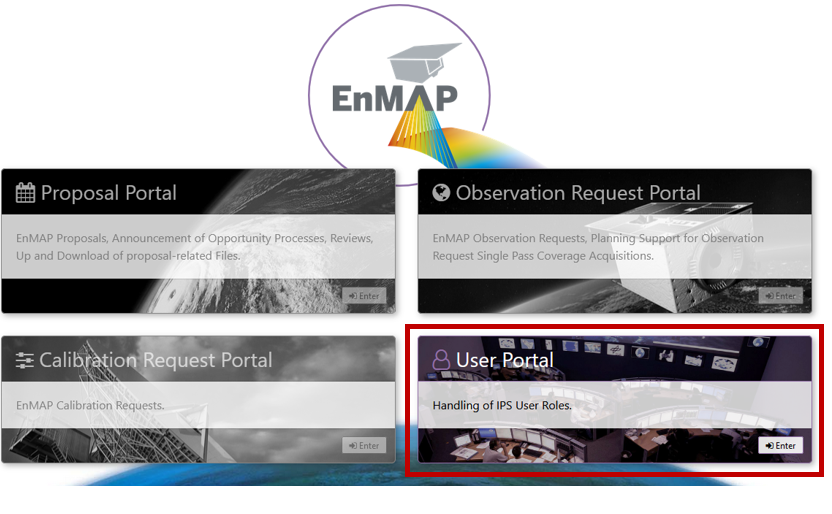
Navigate to the EnMAP Instrument Planning Portal or the EOWEB® GeoPortal.
Click on Registration or Sign-up.
Important
Under current EnMAP data policies, you must register using an institutional or company email address (e.g., affiliated with a university, research center, or commercial enterprise). If you do not have an institutional email address, you must apply for a special exemption by writing directly to enmap_registration@dlr.de.
Fill out your affiliation details and accept the EnMAP Data License Agreement.
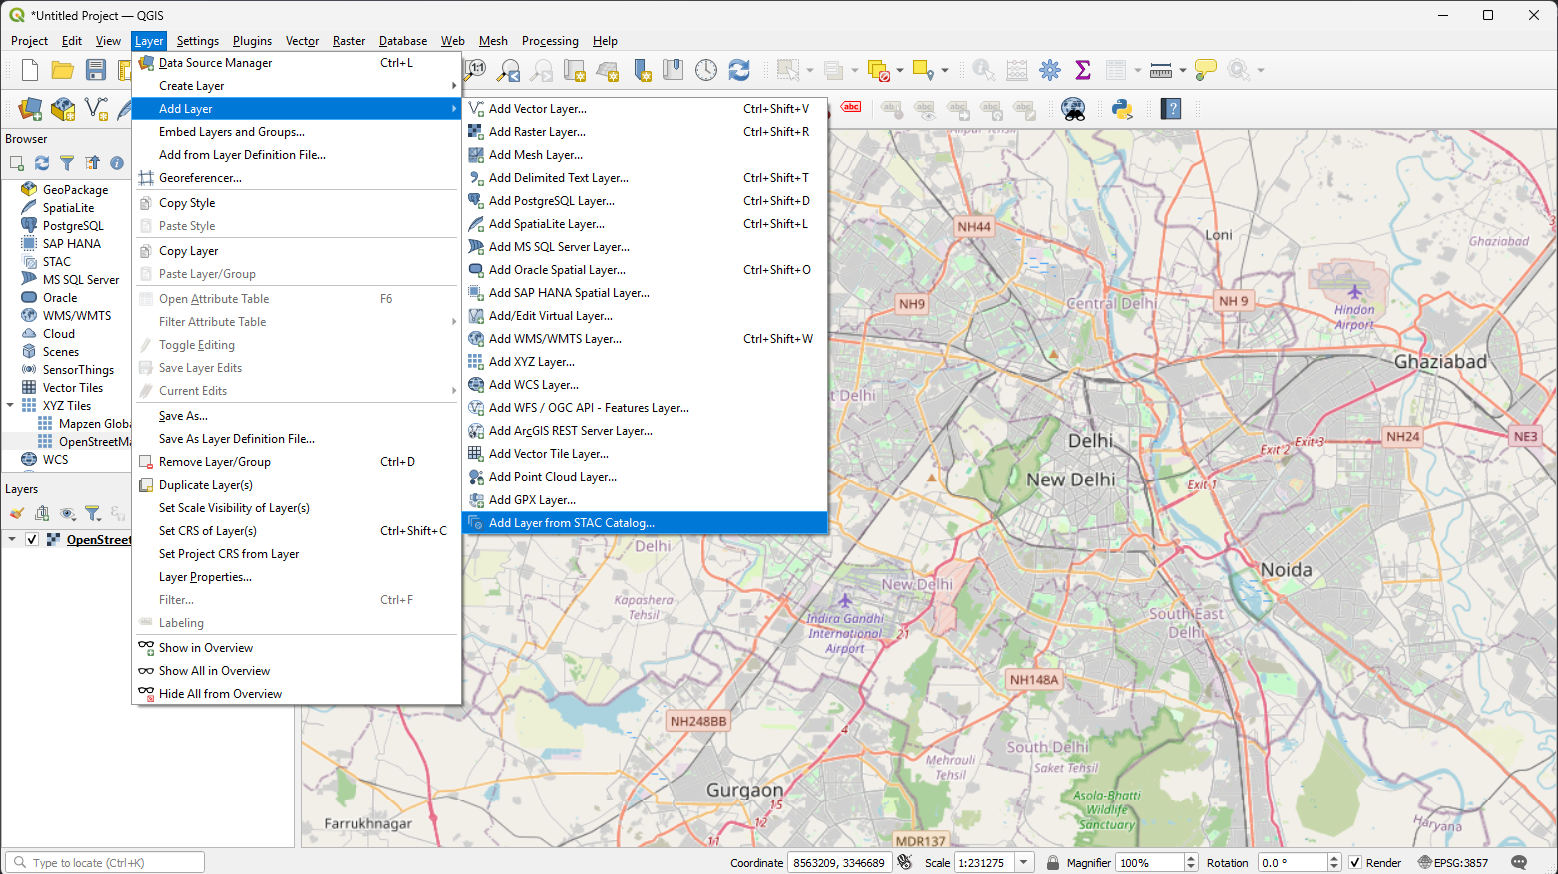
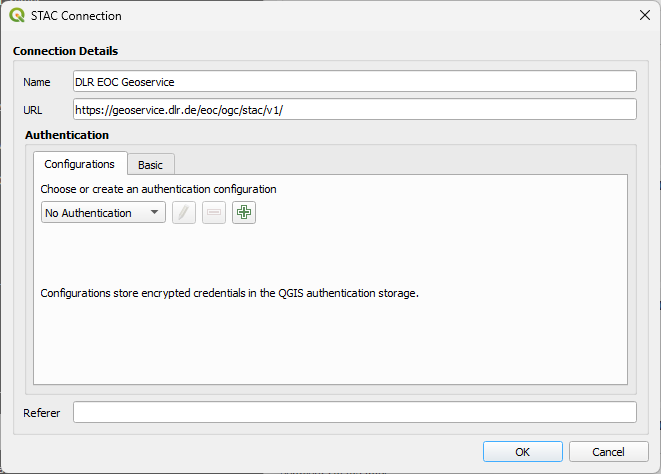
QGIS has native STAC support since version 3.40. However, as now (2026-05-31), it does not allow to use
STAC authentification differing between search and download (QGIS issue #60752).
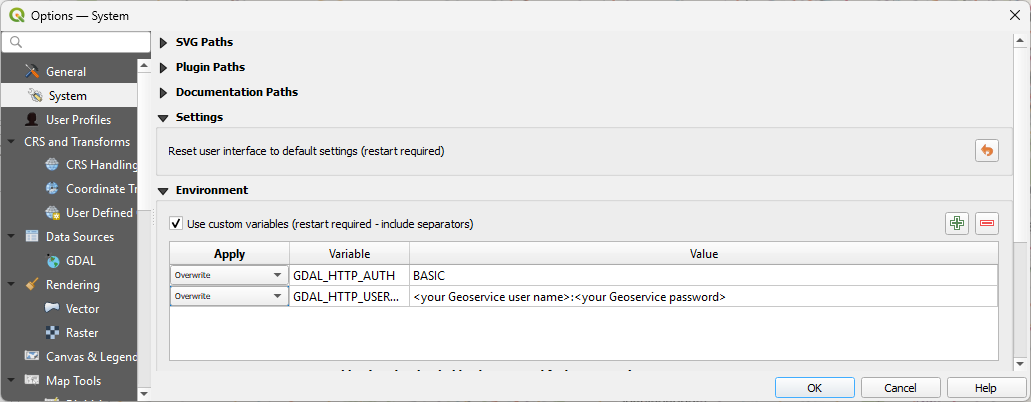
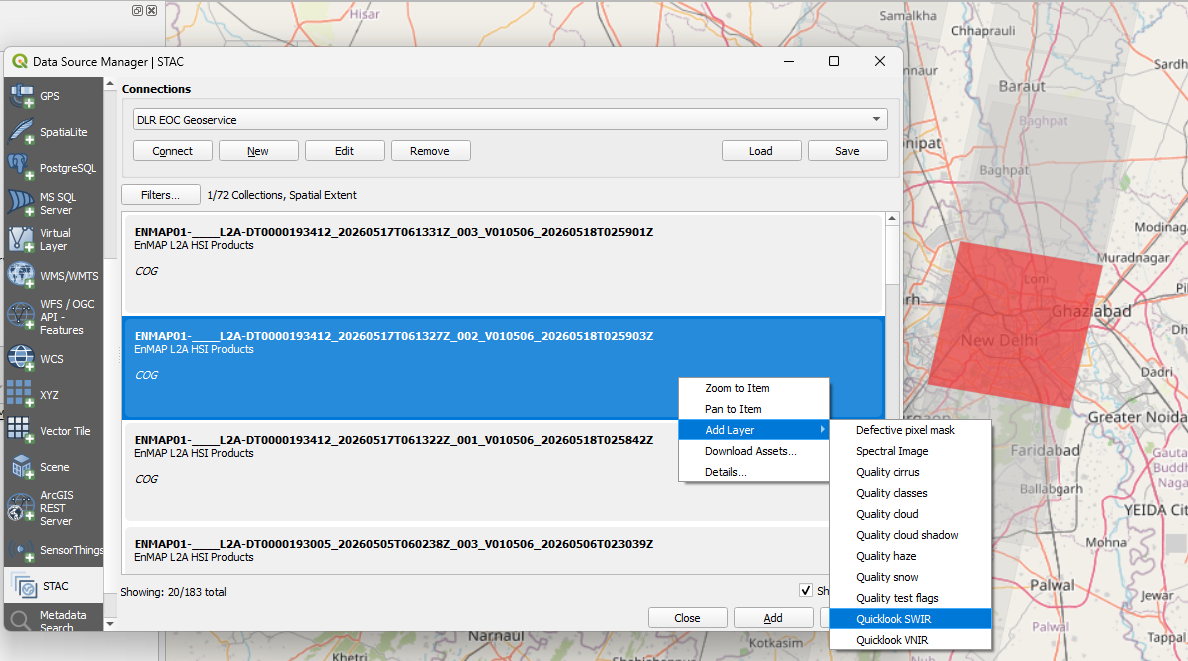
To download EOC Geoservice STAC assets in QGIS, you need to provide your user credentials using the GDAL_HTTP_USERPWD environmental variable.
Set the environmental variables GDAL_HTTP_AUTH and GDAL_HTTP_USERPWD
The Earth Observation Data Access Gateway (EODAG) provides unified programmatic access to different Earth Observation data providers. You can use EODAG via Python to automatically search and download EnMAP Analysis Ready Data (Level-2A) directly from the DLR EOC Geoservice.
Note
Ensure you are using an up-to-date version of EODAG (pipinstall--upgradeeodag), as native support for the DLR Geoservice was added in recent releases.
To access EnMAP data via EODAG, you must configure it to use your DLR Geoservice credentials (the same account you use for the EOWEB® GeoPortal).
Add the dlr_eoc_geoservice provider to your EODAG configuration file. By default, this file is located at ~/.config/eodag/eodag.yml on Linux/macOS or %USERPROFILE%\.config\eodag\eodag.yml on Windows.
Once configured, use the EODAG Python API to query the ENMAP_HSI_L2A collection. The following script searches for EnMAP scenes over a specific bounding box and downloads them to a local directory.
importosfromeodagimportEODataAccessGateway# Initialize EODAG and prioritize the DLR Geoservicedag=EODataAccessGateway()dag.set_preferred_provider("dlr_eoc_geoservice")# Define your search parameterssearch_criteria={"collection":"ENMAP_HSI_L2A","geom":{"lonmin":13.0,"latmin":52.0,"lonmax":13.5,"latmax":52.5},# Example: Berlin area bounding box"start":"2023-05-01","end":"2023-09-30"}print("Searching DLR Geoservice for EnMAP products...")search_results=dag.search(**search_criteria)print(f"Found {len(search_results)} products.")# Define where to save the filesdownload_dir=os.path.join(os.getcwd(),"enmap_downloads")os.makedirs(download_dir,exist_ok=True)# Download and automatically extract the productsprint("Downloading products...")downloaded_paths=dag.download_all(search_results,outputs_prefix=download_dir,extract=True)print(f"Download complete. Files saved to: {download_dir}")
After the download and extraction finish, you can load the resulting imagery directly into QGIS by dragging the files into the EnMAP-Box Data Views panel.
Because the Geoservice provides direct access to live institutional servers, you may occasionally experience connection timeouts.
Note
Encountering a “Bad Gateway” (HTTP 502) Error?
This indicates that your QGIS connection is configured perfectly, but the DLR server is temporarily undergoing maintenance or experiencing heavy load. If this occurs, verify your URL is correct, wait a short while, and try expanding the folder again.
An e-mail is send to your address containing a verification code.
After the successful registration, login to the Instrument Planning Portal and enter the User Portal
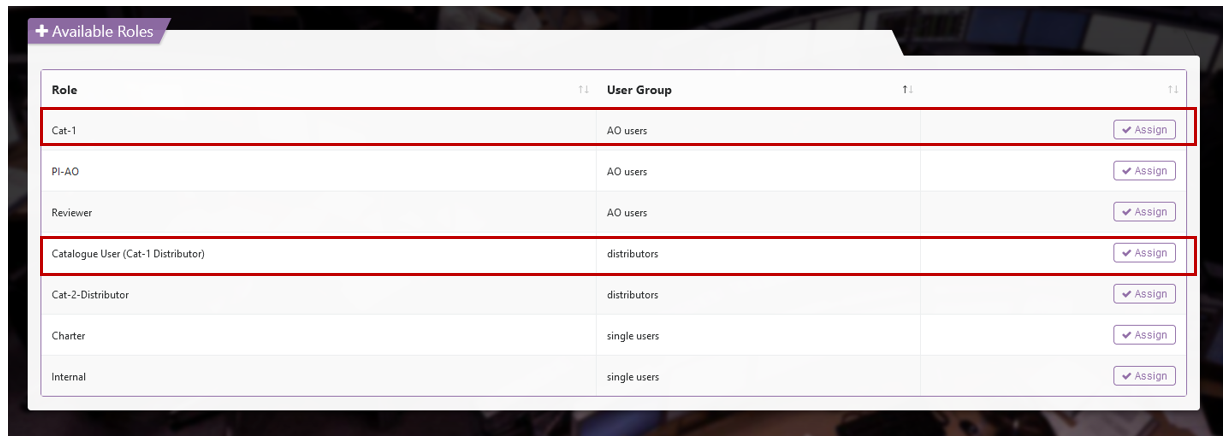
In the User Portal, the user has to go through the Role Assignment procedure which is used to assign different priorities to observation requests.
For more information about the different User Roles please take a look at the Portal User Manual.
To access the data archive, request Catalogue (Cat1-Distributor)
To request data takes / submit proposals for data takes, request Cat-1
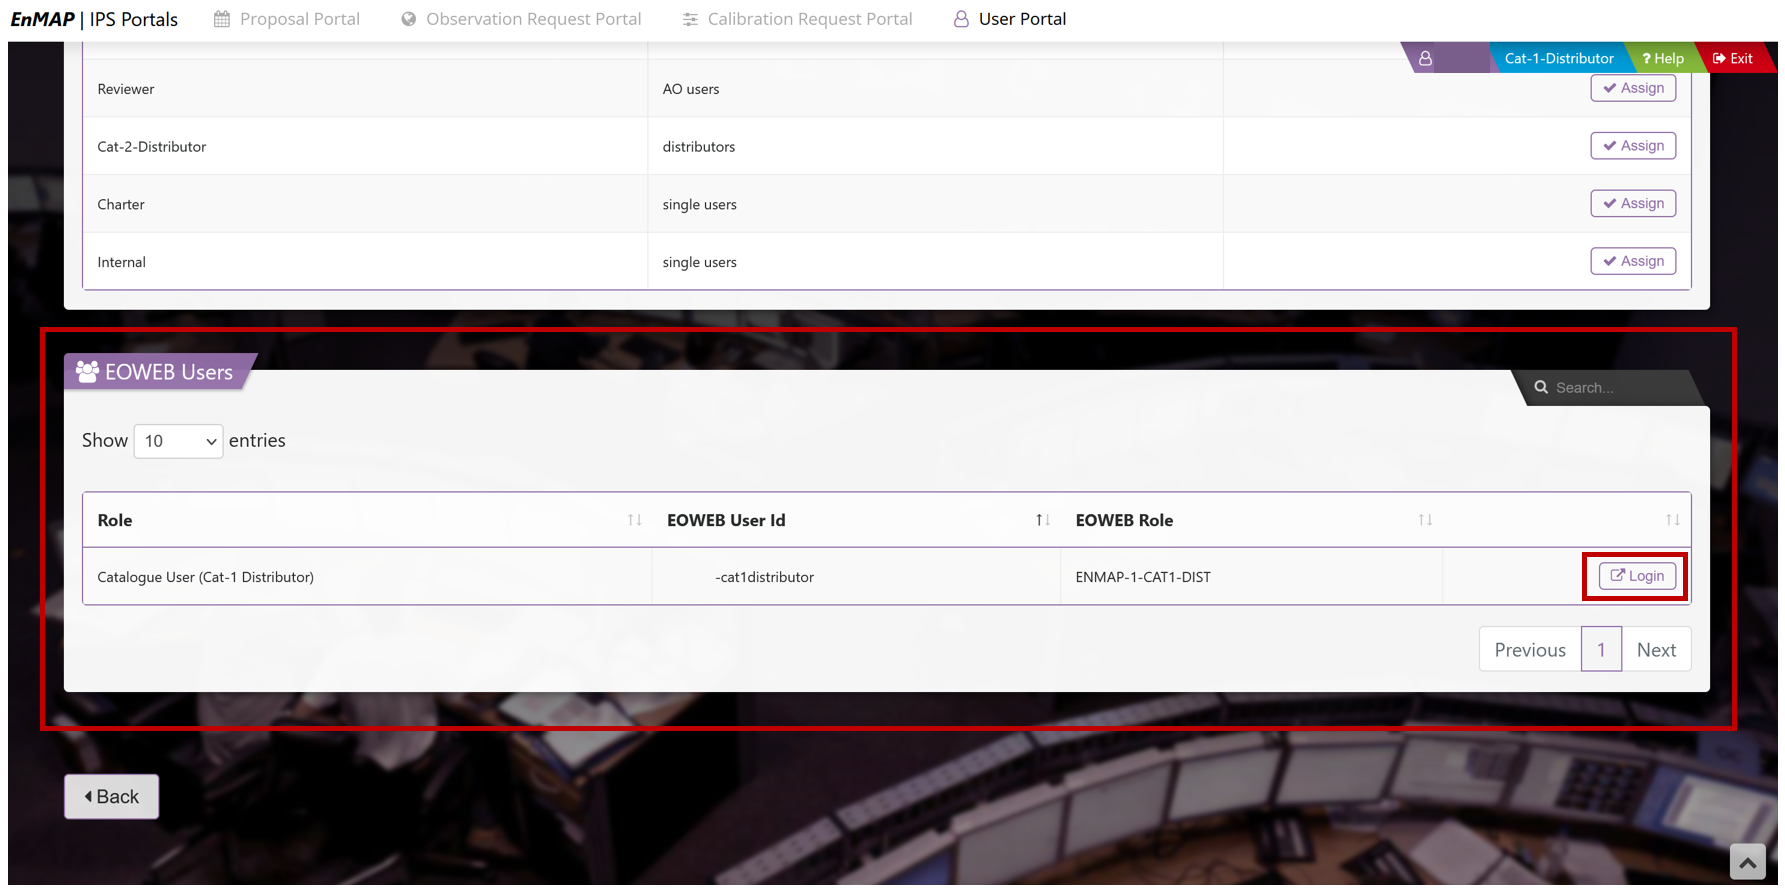
Wait until the respective role is assigned. Note: This will take a few hours.
Once the role has been assigned, a new box will appear in the User Portal, allowing you tp access the EOWEB® GeoPortal to search the EnMAP Data archive and order images.
The EOWEB® GeoPortal access link is created for Cat-1 users after the requested role has been approved by the reviewer.
The login button appears on the User Portal page, which automatically directs to the EOWEB® GeoPortal login page.
Login with the respective User ID associated with the approved role request. The password remains the same as when logging into the Instrument Planning Portal.
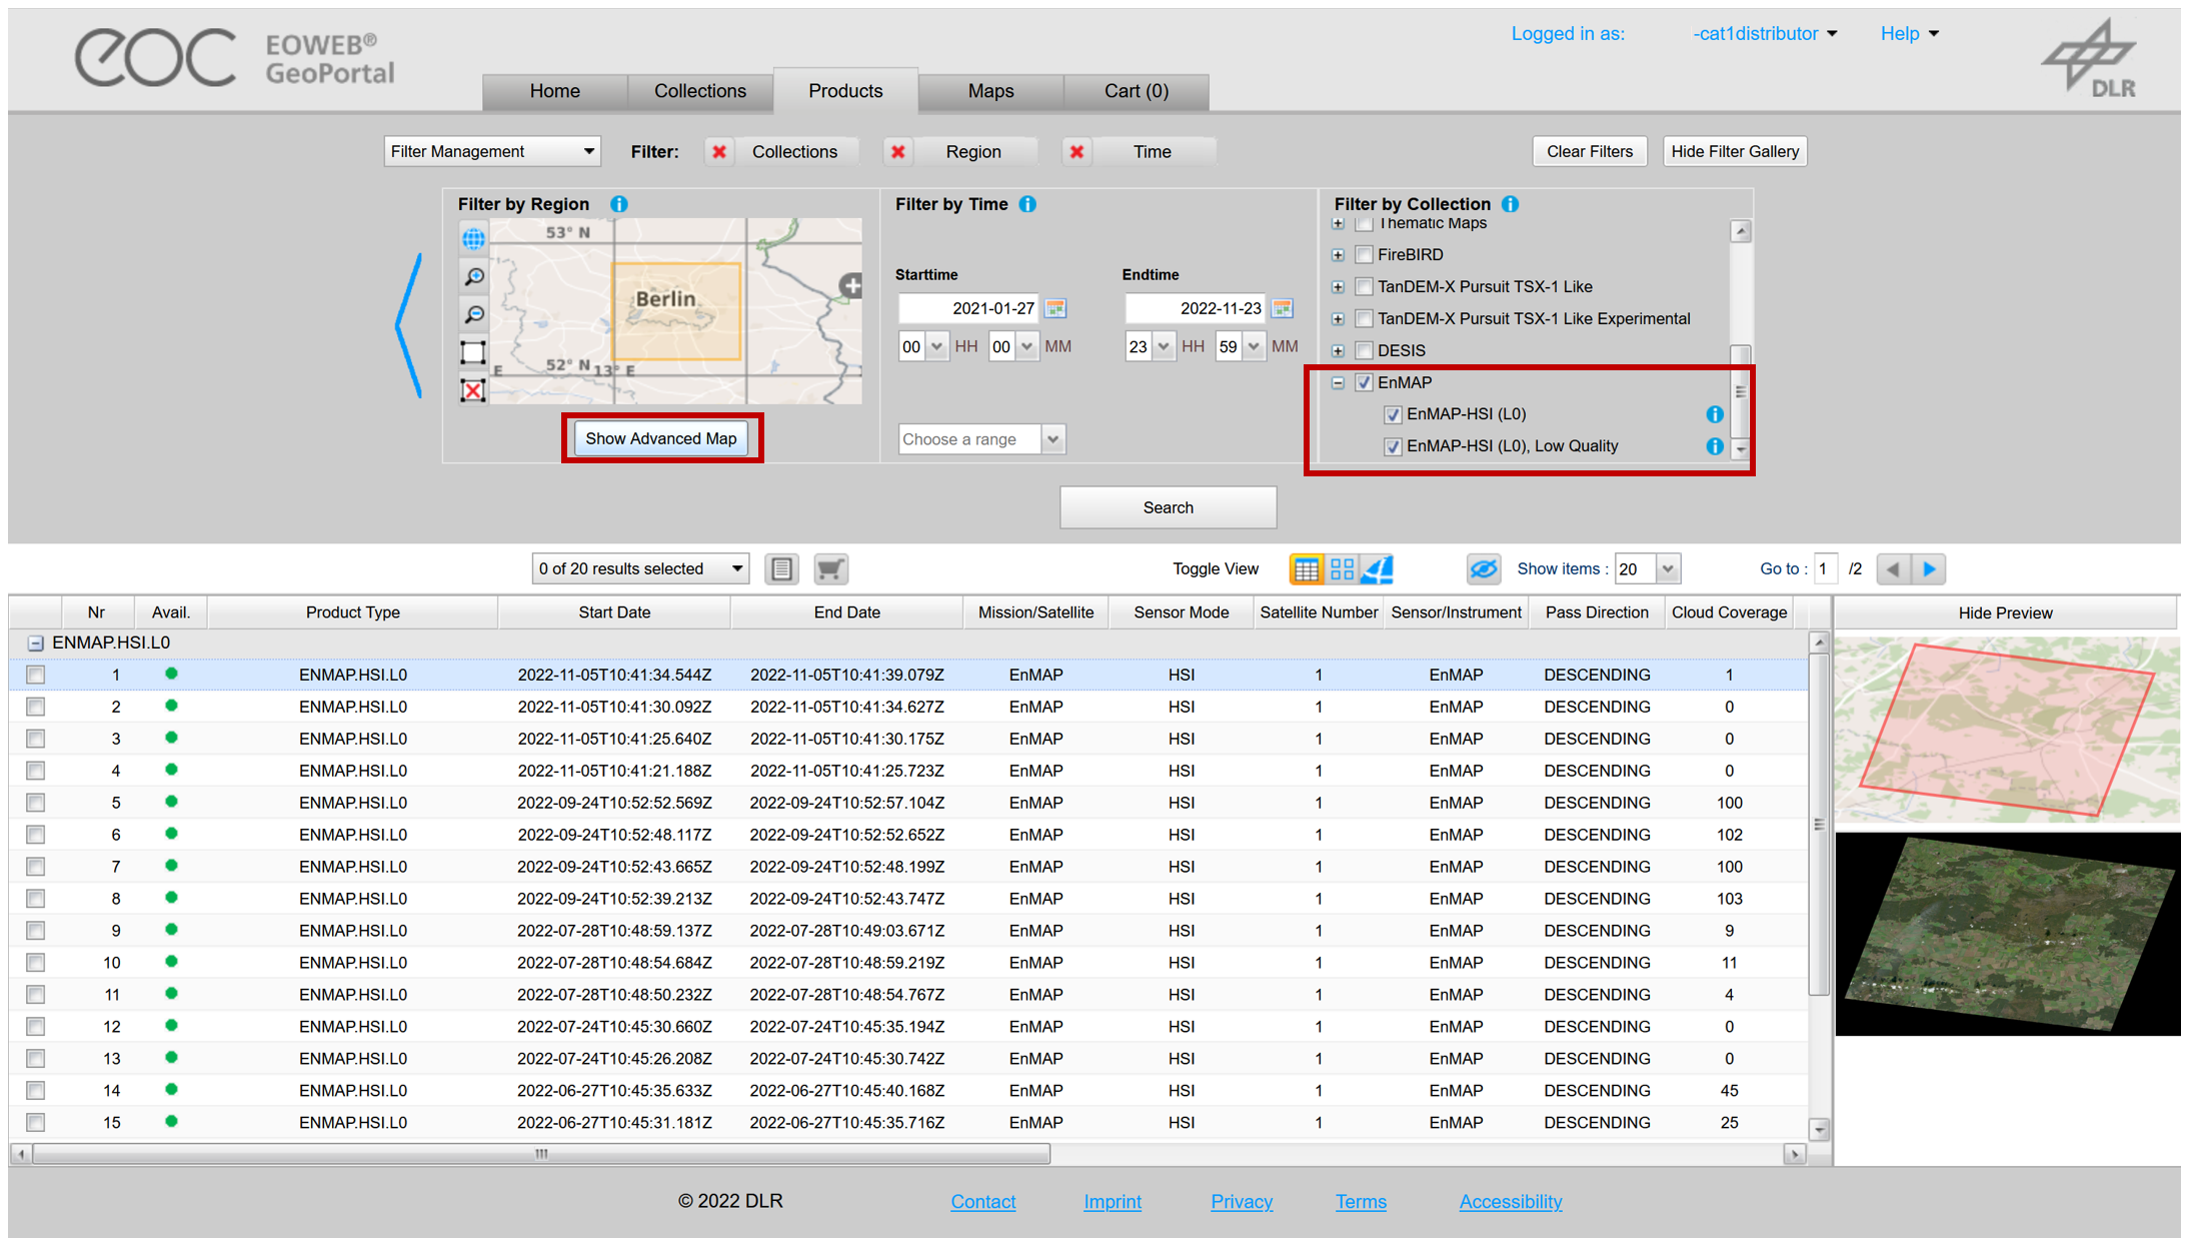
Once logged in, click Show advanced map to zoom, pan and draw a rectangle.
Select EnMAP in Filter Collection and confirm with Search.
Note
You may also want to check the EnMAP-HSI (LO), Low Quality box to see additional records that are marked as low quality, but are still good.
Hide Show advanced map to see the results.
Place your order and wait until you get notified.
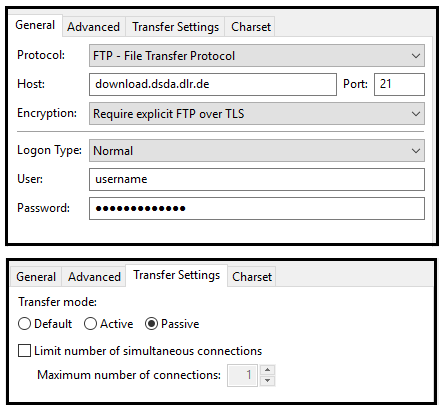
Step 3: Download data from the FTP Delivery Server
After the order is placed, an e-mail is sent including a link to the FTP server and the zipped data.
Note
The User ID and password to access the FTP server are identical to the EOWEB® GeoPortal credentials.
To download the data use a FTP client, for example FileZilla. For further help on how to download the data from the FTP server take
a look at Downloading Ordered Data.