Installation
The Installation section explains how to set up EnMAP‑Box as a QGIS plugin on your computer. It guides you through installing a compatible QGIS version, preparing the required Python environment, and then adding EnMAP‑Box via the QGIS Plugin Manager or from a specific release.
1. QGIS and Python Dependencies
Install QGIS via the official Standalone/OSGeo4W Installer
Install the current QGIS 3.44 LTR to run the latest EnMAP-Box using the QGIS installer from https://www.qgis.org/en/site/forusers/alldownloads.html#windows.
Install Python Dependencies
Close QGIS.
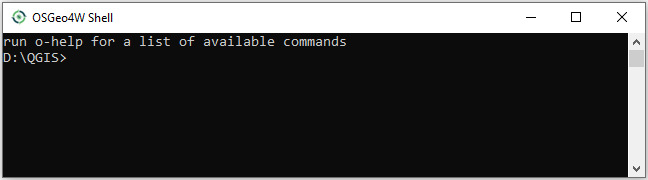
Open the OSGeo4W shell.
Install OSGeo4W managed dependencies (and update QGIS):
setup -q -g -P python3-scipy,python3-matplotlib,python3-colorama,python3-defusedxml,python3-sympy,python3-h5py,gdal-hdf5,python3-pip,python3-setuptools,python3-sympy,python3-numba,python3-netcdf4,python3-pyopengl,python3-scikit-learnInstall PIP managed dependencies:
pip install --upgrade --user -r https://raw.githubusercontent.com/EnMAP-Box/enmap-box/main/.env/osgeo4w/requirements_osgeo4w.txtNote
In rare cases, the user site-packages folder may contain wrongly installed packages, which are interfering with the package version managed by OSGeo4W, e.g. numpy, scipy or gdal. Wrongly installed packages can be deleted manually.
To locate the user folder used by your QGIS instance, run the following inside your QGIS Python console:
>>> import site
>>> print(site.USER_SITE)
C:\Users\<user name>\AppData\Roaming\Python\Python39\site-packages
Open QGIS.
Warning
The internal Python environment in Linux QGIS.app’s restricts isolated package builds, but these are required by EnMAP-Box applications like the EnMAP Processing Tool (EnPT).
We therefore recommend to install QGIS and the Python dependencies required to run the EnMAP-Box using Conda (see the *Conda* tab). This is significantly easier to manage, update, and resolve QGIS and dependency versions over time.
Install QGIS on Linux
Install QGIS as described here https://www.qgis.org/en/site/forusers/alldownloads.html#debian-ubuntu or follow the instructions for conda.
Install Python Dependencies
Open the Terminal (Ctrl + Alt + T).
Make sure the following packages are installed using the system package manager:
sudo apt install python3-pip python3-venv pyqt5-dev-tools python3-matplotlib(Optional) For some EnMAP-Box tools you may also need the following packages:
sudo apt install python3-h5py python3-pyqt5.qtopengl python3-netcdf4Open QGIS and the QGIS Python Console (Ctrl + Alt + P). Type the following and confirm with enter:
import sys; sys.executable
This shows the path of the Python executable that QGIS is using, usually it is
/usr/bin/python3. We need to ensure that additional Python packages get installed into the same Python environment. This is the case if the commandwhich python3returns the path of the Python executable shown in QGIS!If not, please use the full path, e.g.
/usr/bin/python3instead ofpython3in the following steps.Close QGIS.
Create a virtual python environment in a directory of your choice (e.g.
~/.virtualenvs/enmapbox):python3 -m venv --upgrade-deps --system-site-packages ~/.virtualenvs/enmapboxActivate the environment:
source ~/.virtualenvs/enmapbox/bin/activateNow you should see the environment name in brackets at the beginning of your prompt, e.g.
(enmapbox).Install missing Python dependencies with pip inside the virtual environment:
python3 -m pip install -r https://raw.githubusercontent.com/EnMAP-Box/enmap-box/main/.env/linux/requirements_ubuntu.txtStart QGIS (from the activated environment, see step 6):
qgis
Hint
You can add a shortcut to your applications menu, so you do not have to open a Terminal and type the above-mentioned commands (6 & 8) every time you want to start QGIS with the EnMAP-Box environment:
Create the file ~/.local/share/applications/enmapbox.desktop with the following content (if you used another installation path in the instructions above, change accordingly):
[Desktop Entry]
Name=QGIS (EnMAP-Box)
Exec=/bin/bash -c "source ~/.virtualenvs/enmapbox/bin/activate && qgis %F"
Terminal=false
Icon=qgis
Type=Application
Categories=Education;Science;Geography;
Warning
The internal Python environment in macOS QGIS.app’s restricts isolated package builds, but these are required by EnMAP-Box applications like the EnMAP Processing Tool (EnPT).
We therefore recommend to install QGIS and the Python dependencies required to run the EnMAP-Box using Conda (see the *Conda* tab). This is significantly easier to manage, update, and resolve QGIS and dependency versions over time.
Install QGIS on MacOS
Install QGIS using the official macOS installer (e.g., version 3.44 LTR) from the QGIS Download Page. Download the .dmg file, open it, and drag QGIS to your Applications folder.
Install Python Dependencies
Modern QGIS installations on macOS embed Python deeply within the application framework, meaning traditional terminal commands (like calling pip3 from the bin folder) are no longer reliable. To safely install dependencies to the correct environment, you must execute the installation directly from within QGIS.
Launch QGIS.
Navigate to Plugins ‣ Python Console in the top menu bar.
Copy the script below, paste it into the console prompt (
>>>), and press Enter:
import sys
import os
import runpy

# 1. Manually create the missing 'bin' directory so pip stops crashing
broken_bin_path = "/Applications/QGIS.app/Contents/Frameworks/bin"
os.makedirs(broken_bin_path, exist_ok=True)

print("Created missing bin directory. Finishing installation...")

original_argv = sys.argv
enmap_packages = [
    "colorama", "astropy", "PyOpenGL", "xgboost", "lightgbm",
    "catboost", "sympy", "numba>=0.57", "scikit-learn>=1.0"
]

# 2. run pip with a flag to silence the script warnings
sys.argv = ["pip", "install", "-U", "--no-warn-script-location"] + enmap_packages

try:
    runpy.run_module("pip", run_name="__main__")
except SystemExit:
    pass
except Exception as e:
    print(f"An error occurred: {e}")
finally:
    sys.argv = original_argv
    print("=========================================")
    print("All packages are now fully installed!")
    print("You can safely activate EnMAP-Box 3.")
    print("=========================================")
Wait for the packages to download and compile. Once the console prints the success message, you can close the Python Console.
Install QGIS and Python dependencies with conda (cross-platform)
Conda is a cross-platform package manager that allows to install software in separated environments. We recommend to install and use Miniforge, a minimal conda installer specific to packages from conda-forge channel. It contains a meta-package for packages needed by the EnMAP-Box https://anaconda.org/channels/conda-forge/packages/enmapbox/overview
Open a conda terminal and create a conda environment that contains QGIS and all required packages.
Use the enmapbox recipe to install packages required to run the EnMAP-Box, including EnPT, EnFROSP, SpecDeepMap
conda create -n enmapbox -c conda-forge enmapbox
Use the enmapbox-lite recipe to install packages required to run the EnMAP-Box and most machine-learning applications
conda create -n enmapbox -c conda-forge enmapbox-lite
Activate the conda environment and start QGIS:
conda activate enmapbox
qgis
Note
QGIS, GDAL and other packages are developing rapidly. To keep an environment <env_name> up to date, call:
conda activate <env_name>
(<env_name>) conda update --all
To delete a conda environment, call:
conda env remove -n <env_name>
To use a specific package version, call conda install <package>=<version>.
Such a step may require an update of various other packages. For example to use a specific QGIS version, call:
conda activate <env_name>
(<env_name) conda install qgis=3.40
2. Install EnMAP-Box
Install EnMAP-Box Plugin via the QGIS Plugin Manager
Start QGIS
Go to Plugins -> Manage and Install Plugins
Search for ‘EnMAP-Box’
Click on ‘Install Plugin’

- Activate Experimental Plugins (Optional)
Go to Plugins -> Manage and Install Plugins -> Settings
Enable Show also Experimental Plugins

The install the qgis-plugin-manager allows to install QGIS plugins like the EnMAP-Box from the command line:
**Install EnMAP-Box Plugin via the QGIS Plugin Manager**

# define the path where your plugins are stored
export QGIS_PLUGINPATH=~/.local/share/QGIS/QGIS3/profiles/default/python/plugins
mkdir $QGIS_PLUGINPATH

# install the 3Liz qgis-plugin-manager
conda install qgis-plugin-manager
qgis-plugin-manager init
qgis-plugin-manager update

# install the EnMAP-Box
qgis-plugin-manger install 'EnMAP-Box 3'